Tuesday, December 29, 2009
Safety Equipment
More than one way to skin a cat...or skin a fish....

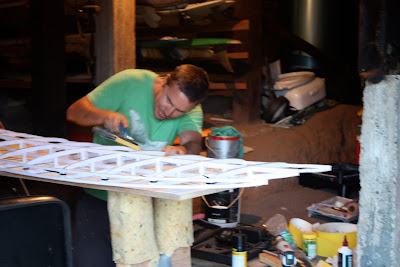
Merry Christmas to all , better late than never!. Had plenty of rain over the past few days which has given me plenty of time to slowly glue all the ribs together and finish off the tail piece and glue it together. I also got a tad excited and cut the first skin for the board. This piece will form the bottom of the deck.
Friday, December 25, 2009
Stage two complete - nose and tail


So i managed to squeeze the nose together with some persistance and good cable ties ( reusable cable ties are great for this project). The tail shape was inspired by my 6'4'' Twin fish that i ride most days and is super fast. Overall fairly happy with the shapes at both ends. Next test will be the glueing of it all.
Sunday, December 20, 2009
Fish Fins
Had a go at sanding a couple of fins for the the quad yesterday. I used the inside cutouts from my tail supports and they have turned out pretty well as the small fins in my proposed quad set. Grant told us that it is easier to have glassed in fins than FCS because there is not as much structural work to be done on the inside of the board. I have also now shaped the top nose support and begun gluing it in place. This has helped to push the rail band into a more even curve at the front of the board.


Wednesday, December 16, 2009
Fish Tales (it was THIS big)


Spent some time today cutting out supports for the tail. This meant I needed to make a decision about tail shape. I went with a deep fish tail that hopefully when I couple it with quad fins will be both stylish and perform well. Also started to glue each join piece by piece. The stringer and some of one of the rails is now glued. The board is already feeling sturdy. I'm not sure that the rail curve is perfect but hey, it is my first board after all...
Tuesday, December 15, 2009
Railbands tied on


After drilling out the holes for the ribs to slot into the railbands I have now cabletied the board together. This makes it look further along than I actually am. Once seeing all the pieces together I have now started sanding back to match up each connection. Exciting times, I wanted to just glue it straight away but after speaking with co-shaper scott I decided that may be rushing it a bit. Am now going to work out a nose shape and then cut a support piece for there. We are using Selleys Aquadhere Polyurethane glue, it expands as it dries so should fill any of the little mistakes made so far on the internals. Hopefully we can minimise these mistakes now that things start to become visible on the outside of the board.
Monday, December 14, 2009
Duncs' skeleton finally takes shape

Well its been a few weeks but I have finally got into gear and cut out the ribs, stringer and rail bands for my board. Scotty has been at this stage for a few weeks, due to work commitments I haven't been able to catch up until now. So here is the board just slotted together. Soon I'll glue it all together and then cut out the deck. I think I'm going to make this board a quad. Will probably cut out the fins this afternoon. I think my neighbours are sick of the sound of the jigsaw, but hey a mans gotta do what a mans gotta do. Next update coming alot sooner than this one did (I hope).
Thursday, November 5, 2009
strapped in for the ride....

well i got a bit excited and wanted to know if all the parts fitted together. After gentle manipulation and plenty of sanding and cutting i was able to get some sort of idea whther or not it fitted all together. i still need to cut and fit some internal braces for the nose and tail of the board, but at least it starting to take shape.
Wednesday, October 28, 2009
the final weight
To cut or not to cut?..that is the question

So i cut the majority of the internal timber from the stringer as most wooden board shapers tend to do to help reduce the weight, but after looking at the total amount of weight removed (72grams!!) i wondered if i needed to.... i still got the internal part of the ribs to cut out as well, so i thought i might as well weigh the whole lot once i'm done for future project knowledge...stay tuned for total weight
the rib bone connected to the spine bone...
Friday, October 23, 2009
The dimensions
Thursday, October 15, 2009
Shaping Table - Prototype 1

Just finished off the shaping table today. Rough, knock up job, but should do the trick I think... The hardest bit was getting the prongs at the top to be strong enough. I just pretty much used my eye to work out heights etc.. Time will tell if it is a good design. The dog seems to like it though...
Tuesday, October 13, 2009
Fish ribs


Well it has begun, I've made the first cuts. The plan is to create a board from plywood. Grant Newby tells us it can be done and has been very generous with his tips and pointers to get started. Now that I have jigsawed out each rib I will now sand them back to be the perfect size. Because Scotty and I will be building from the inside out, the skeleton has to be precise if the final outcome is to be any good. Stay tuned...
Subscribe to:
Comments (Atom)


